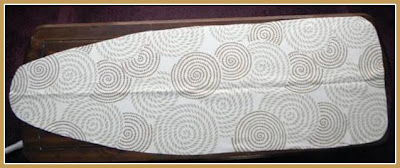
My ironing board was in desperate need of a new cover. It was stained, torn and everything I don't want to be pressing beautiful fabric on. A makeover was definitely in order. This one cost me under $1.
A couple weeks ago I was at the thrift store and found this fabric in brand new condition for $1.99. I only needed about half of it for this project. I fell in love with fabric right away - its so island-like :)
I'll share with you my super-easy tutorial. If you're just getting started in sewing, this is a fun little challenge for you. And no crazy patterns - your pattern is your original ironing board cover :)
You will need:
- Fabric of your choice (get about twice the amount of your original cover)
- Twine, more than enough to go around your cover (if your original cover has twine, like mine does, reuse this)
- Coordinating thread
- Pins
- Seam ripper
Step 1. Remove original cover. If you have twine in yours, use a seam ripper to carefully tear through the stitches to remove it.
Step 2. Flatten out cover as best you can and then lay it on top of your new fabric, with new fabric wrong side up. Trace around cover, giving yourself an inch or two from the outline. Better to have your outline too large than too small. Excuse my poor Paint demo...you get the idea.
Step 3. Cut with fabric shears. If desired, serge or zig-zag stitch all the way around to prevent fraying.
Step 4. With fabric wrong side up, place twine a half inch from the edge of the fabric all around the outline. See picture below.
Step 5. Fold edge of fabric over the twine, and pin. Place pins about an inch apart, leaving a 4-5 inch opening at the bottom of your cover. This is where the ends of your twine will hang, so you can pull and tighten later on.
Step 6. Now its time to sew. Place needle half inch from edge. Make sure your twine is pressed up against the edge underneath the fold. Check every so often while sewing just to be sure you're not sewing over it. Adjust your pins if needed to secure it.
Step 7. Remember to leave a 4-5" opening at the bottom. Once you're done, just pull the ends of the twine and place/tuck around your ironing board! The more you pull, the more the edges will "scrunch", forming to your ironing board in the same your original cover did :)
If you want, instead of just letting the strings hang, find something to clasp them..like a decorative button...crafty laundry pin...whatever floats your boat! The point is simple AND frugal. And if possible, resourceful by using/reusing things you already have on hand.
Linking to: Growing Home, Far Above Rubies, Deep Roots at Home, Raising Homemakers, Raising Mighty Arrows, Our Simple Country Life, Women Living Well, Time Warp Wife, Homestead Revival


